> ## Documentation Index
> Fetch the complete documentation index at: https://conductorone-docs-iga-1271.mintlify.site/llms.txt
> Use this file to discover all available pages before exploring further.
# Set up a Cloudflare connector
> ConductorOne provides identity governance and just-in-time provisioning for Cloudflare. Integrate your Cloudflare instance with ConductorOne to run user access reviews (UARs), enable just-in-time access requests, and automatically provision and deprovision access.
**A newer version of this connector is available.** This version of the connector is no longer available for installation. If you're setting up a Cloudflare connector with ConductorOne for the first time, use the [v2 version](/baton/cloudflare).
## Capabilities
* Sync user identities from Cloudflare to ConductorOne
* Resources supported:
* Roles
* Provisioning supported:
* Role assignments
* Accounts
## Add a new Cloudflare connector
This task requires either the **Connector Administrator** or **Super Administrator** role in ConductorOne.
In ConductorOne, navigate to **Integrations** > **Connectors** and click **Add connector**.
Search for **Cloudflare** and click **Add**.
Choose how to set up the new Cloudflare connector:
* Add the connector to a currently unmanaged app (select from the list of apps that were discovered in your identity, SSO, or federation provider that aren't yet managed with ConductorOne)
* Add the connector to a managed app (select from the list of existing managed apps)
* Create a new managed app
**Do you SSO into Cloudflare using your identity, SSO, or federation provider?** If so, make sure to add the connector to the unmanaged Cloudflare app that was created automatically when you integrated your provider with ConductorOne, rather than creating a new managed app.
Set the owner for this connector. You can manage the connector yourself, or choose someone else from the list of ConductorOne users. Setting multiple owners is allowed.
A Cloudflare connector owner must have the following permissions:
* **Connector Administrator** or **Super Administrator** role in ConductorOne
* **Super Administrator** access in Cloudflare
Click **Next**.
### Next steps
* **If you are the connector owner**, proceed to Configure your Cloudflare connector]\(/baton/v1/cloudflare#configure-your-cloudflare-connector) for instructions on integrating Cloudflare with ConductorOne.
* **If someone else is the connector owner**, ConductorOne will notify them by email that their help is needed to complete the setup process.
## Configure your Cloudflare connector
A user with the **Connector Administrator** or **Super Administrator** role in ConductorOne and **Super Administrator** access in Cloudflare must perform this task.
### Step 1: Locate your Cloudflare Account ID
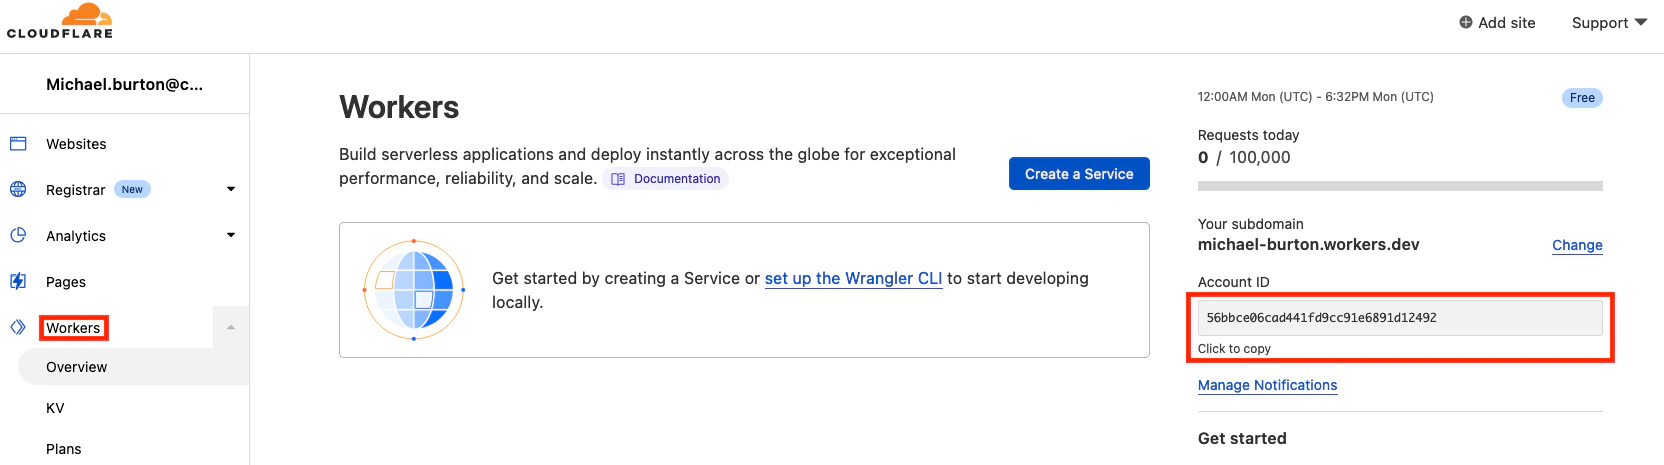
Log into your Cloudflare Super Administrator account and select **Workers** from the left nav.
On the **Workers** page, find your Account ID on the right side of the page.
Copy and save the Account ID. We'll use it in Step 3.
 ### Step 2: Create an API token
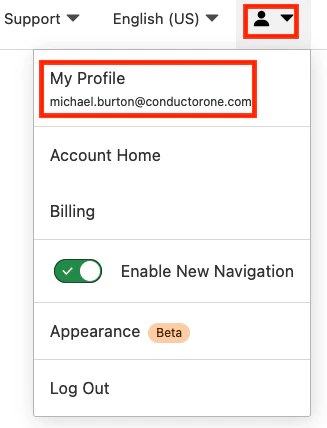
Click the user icon and select **My Profile**
### Step 2: Create an API token
Click the user icon and select **My Profile**
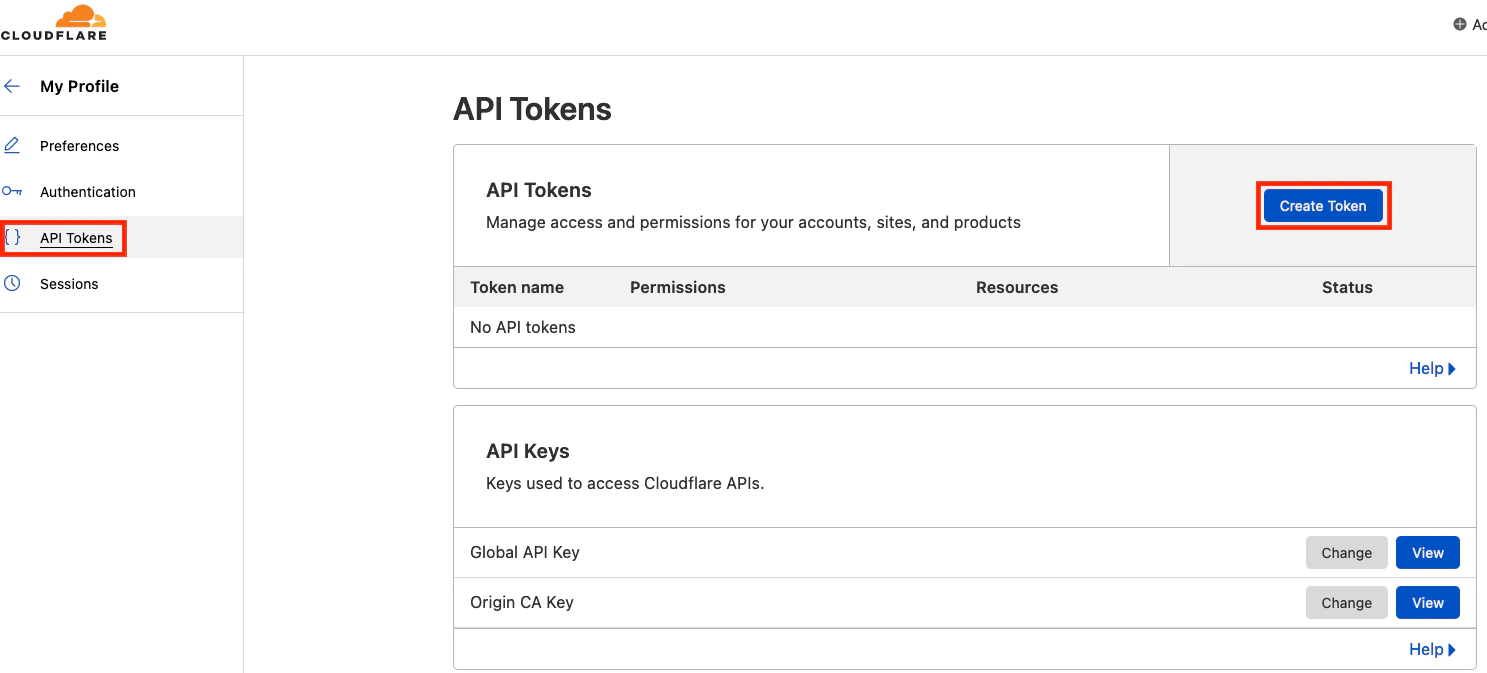
 Click **API Tokens** on the left side, then click **Create Token**.
 At the bottom of the page, in the **Custom Token** area, click **Get started**.
Fill out the **Create Custom Token** page as follows:
1. Give the API token a name, such as **ConductorOne**
2. Set the appropriate permissions for the API token:
* To provision Cloudflare access via ConductorOne and run access reviews on your Cloudflare users:
* Account -> Account Settings -> Edit
* Account -> Access: Organizations, Identity Providers, and Groups -> Read
* To run access reviews on your Cloudflare users:
* Account -> Account Settings -> Read
* Account -> Access: Organizations, Identity Providers, and Groups -> Read
3. Click **Continue to summary**
At the bottom of the page, in the **Custom Token** area, click **Get started**.
Fill out the **Create Custom Token** page as follows:
1. Give the API token a name, such as **ConductorOne**
2. Set the appropriate permissions for the API token:
* To provision Cloudflare access via ConductorOne and run access reviews on your Cloudflare users:
* Account -> Account Settings -> Edit
* Account -> Access: Organizations, Identity Providers, and Groups -> Read
* To run access reviews on your Cloudflare users:
* Account -> Account Settings -> Read
* Account -> Access: Organizations, Identity Providers, and Groups -> Read
3. Click **Continue to summary**
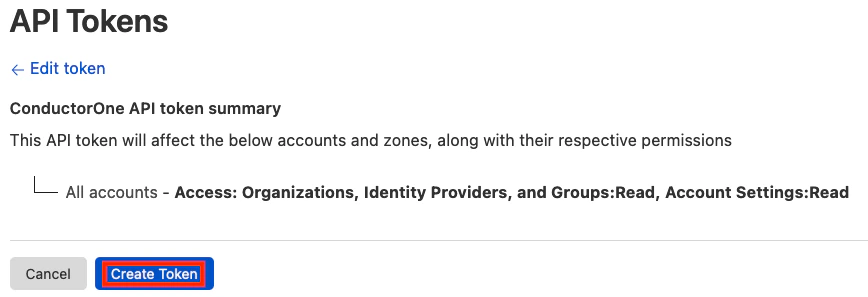
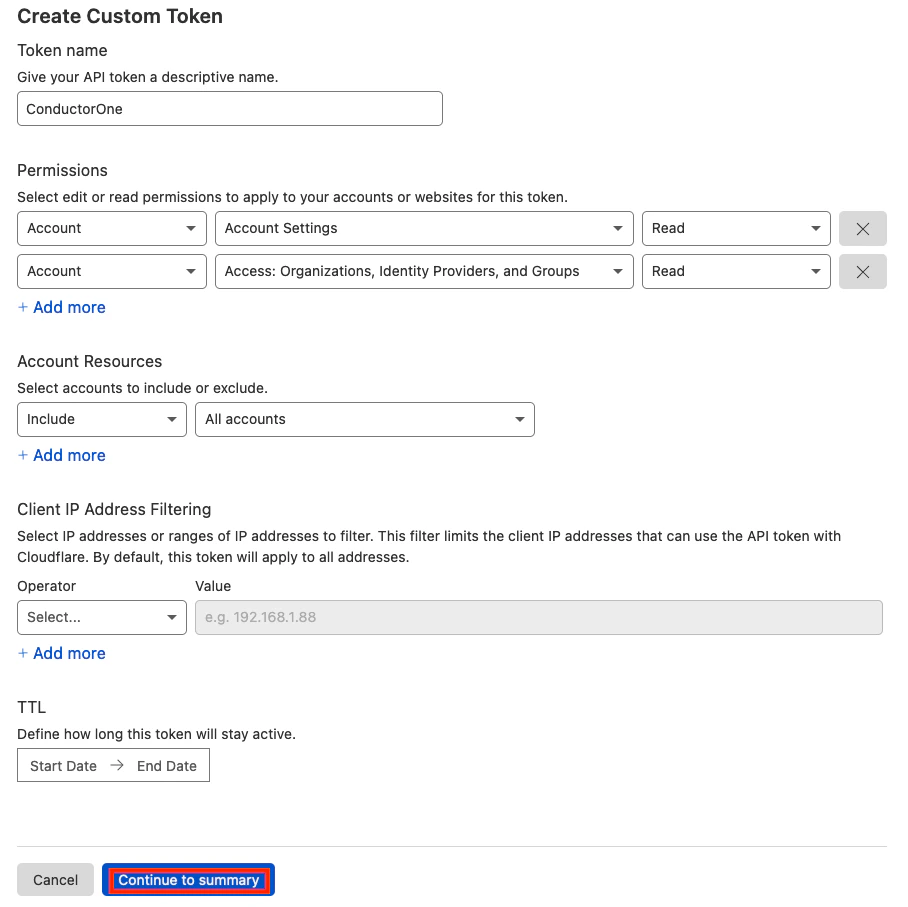 Click **Create Token** and copy the token generated for you. We'll use it in Step 3.
 ### Step 3: Add your Cloudflare credentials to ConductorOne
In ConductorOne, navigate to the Cloudflare connector by either:
* Clicking the **Set up connector** link in the email you received about configuring the connector.
* Navigate to **Connectors** > **Cloudflare** (if there is more than one **Cloudflare** listed, click the one with your name listed as owner and the status **Not connected**).
Find the **Settings** area of the page and click **Edit**.
Enter the account ID you looked up in Step 1 into the **Account ID** field.
Paste the API token you generated in Step 2 into the **API key** field.
Click **Save**.
The connector's label changes to **Syncing**, followed by **Connected**. You can view the logs to ensure that information is syncing.
**That's it!** Your Cloudflare connector is now pulling access data into ConductorOne.
### Step 3: Add your Cloudflare credentials to ConductorOne
In ConductorOne, navigate to the Cloudflare connector by either:
* Clicking the **Set up connector** link in the email you received about configuring the connector.
* Navigate to **Connectors** > **Cloudflare** (if there is more than one **Cloudflare** listed, click the one with your name listed as owner and the status **Not connected**).
Find the **Settings** area of the page and click **Edit**.
Enter the account ID you looked up in Step 1 into the **Account ID** field.
Paste the API token you generated in Step 2 into the **API key** field.
Click **Save**.
The connector's label changes to **Syncing**, followed by **Connected**. You can view the logs to ensure that information is syncing.
**That's it!** Your Cloudflare connector is now pulling access data into ConductorOne.